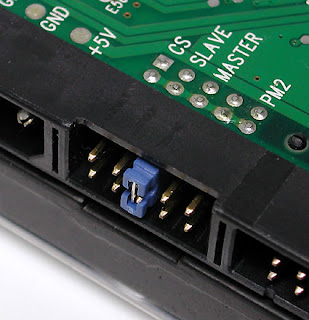
1. Firstly make sure 1st hdd set as a Master (jumper) and connect with IDE cable with primary connection. 1st IDE cable will connect with motherboard on IDE1 socket.
2. After that 2nd hdd set as Slave (jumper) and connect with IDE cable with secondary connection. This connection using same IDE cable with the 1st hdd.
 Jumper setting
if you try connect with 3rd hdd, follow this step
3. Set 3rd hdd as a Master (jumper) and connect with 2nd IDE cable with primary connection. 2nd IDE cable will connect with motherboard on IDE2 soket.
3. Set 3rd hdd as a Master (jumper) and connect with 2nd IDE cable with primary connection. 2nd IDE cable will connect with motherboard on IDE2 soket.
if you try connect with 4th hdd, follow this step
4. Set your 4th hdd as a Slave (jumper) and connect with 2nd IDE cable with secondary connection.
If you try connect with 5th & 6th hdd using SATA connection, follow this step
5. Just plug in power cable and data cable with SATA hdd and connect with motherboard
Make sure your 1st boot will read from 1st hdd. This is because only 1st hdd have operating system. You can change boot order in BIOS.
tips: use same way to connect more than 1 cdrom drive or using multiply rom drive like cdrom, dvdrom or burner.


