 Select Accounts
 Remove all of that
 Click Add > Mail
 Type your display name
Click next
 Type pop.tm.net.my in 'Incoming' & smtp.tm.net.my in 'Outgoing'
Click next
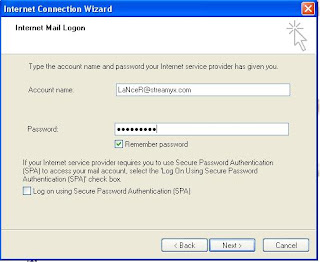
 Type your 'Account name' & 'Password'
Click next
 Click 'Finish'
 Go again to 'Internet account setting' & click 'Properties'
 It should look like this
 On server tab, it's should look like this
Click on 'My server...........' & click 'Apply'
Now you done, it's very simple


No comments:
Post a Comment